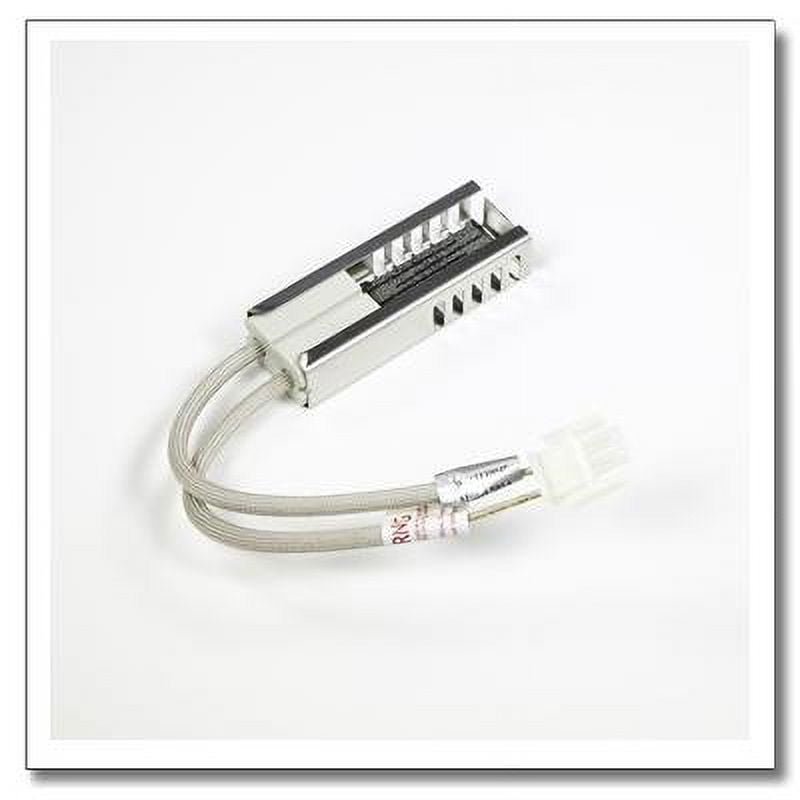
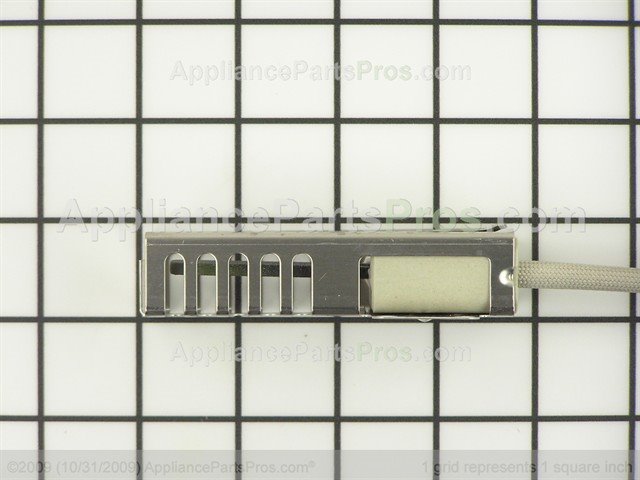
The WB13T10045 igniter assembly plays a crucial role in the operation of gas ovens, ensuring that they ignite reliably and operate efficiently. In the realm of kitchen appliances, understanding the functionality and maintenance of components like the WB13T10045 can save homeowners time and money while enhancing the cooking experience.
What is the WB13T10045 Igniter Assembly?
The WB13T10045 is specifically designed for certain models of gas ovens. It is an essential component that ignites the gas burner when the oven is turned on. The igniter uses a small amount of electricity to generate heat, which then ignites the gas from the burner. Without a functional igniter, cooking becomes a challenge, as the burner will not ignite and produce heat.
How Does the WB13T10045 Work?
The operation of the WB13T10045 igniter is fairly straightforward, yet critical. When the user turns on the oven, electrical currents flow to the igniter. The igniter’s internal resistance heats it up, reaching a glowing temperature that ignites the gas entering the burner. This method of ignition is commonly used in modern ovens due to its reliability and efficiency compared to older methods like pilot lights.
Signs of a Failing WB13T10045 Igniter Assembly
Identifying issues with the igniter assembly early can prevent more significant problems or complete oven failure. Here are some signs that your WB13T10045 may be failing:
- Delayed Ignition: If you notice a significant delay before the oven lights up, this could indicate a problem with the igniter.
- Oven Not Heating: If the oven isn’t reaching the desired temperature, the igniter might not be functioning properly.
- Burner Clicks Without Ignition: A clicking sound may occur when trying to ignite, but if there’s no flame, the igniter isn’t doing its job.
Importance of Maintaining the WB13T10045 Igniter Assembly
Regular maintenance of the WB13T10045 igniter assembly is essential not only for ensuring that your oven works effectively but also for safety. A malfunctioning igniter can pose risks such as gas leaks or incomplete combustion, leading to dangerous situations. Here are some tips for maintaining your igniter:
- Clean the Igniter: Food debris and grease can accumulate on the igniter, affecting its performance. Regularly clean it gently.
- Check for Damage: Inspect the igniter periodically for cracks or burns. Replace it if you notice any damage.
- Ensure Proper Connections: Loose electrical connections can lead to poor performance. Ensure that all connections to the igniter are secure.
How to Replace the WB13T10045 Igniter Assembly
If you determine that your WB13T10045 igniter needs to be replaced, the process can often be completed at home with minimal tools. Here’s a brief guide:
- Disconnect Power: Always disconnect the oven from the power source before beginning any repairs.
- Access the Igniter: Remove the oven door and any panels necessary to access the igniter.
- Unplug the Igniter: Carefully disconnect the old igniter from the connecting wires.
- Install the New Igniter: Position the new WB13T10045 igniter in place and reconnect the wires.
- Reassemble the Oven: Replace any panels and reattach the oven door.
- Test the Oven: Reconnect the power and test the oven to ensure it ignites correctly.
Conclusion
The WB13T10045 igniter assembly is an indispensable part of any gas oven, ensuring a reliable and safe cooking experience. By recognizing the signs of failure and understanding the importance of maintenance, homeowners can prolong the life of their ovens and enhance overall functionality. Whether you’re replacing the igniter yourself or seeking professional help, being informed about this crucial component helps ensure your kitchen remains a hub of culinary activity.